How to Install a Single Zone Mini-Split System: A Step-by-Step Guide
A single zone mini-split system is an energy-efficient and versatile solution for heating and cooling individual rooms or spaces within your home. Mini-split systems consist of an indoor air handling unit and an outdoor condenser unit, connected by refrigerant lines. Installing a mini-split system can be a manageable DIY project for homeowners with some electrical and HVAC experience. In this article, we will guide you through the process of installing a single zone mini-split system.
Gather the necessary tools and materials:
Before starting the project, make sure you have the required tools and materials on hand. These may include:
- Mini-split system (indoor and outdoor units)
- Mounting bracket or pad for the outdoor unit
- Line set (refrigerant lines, electrical wires, and condensate drain line)
- Hole saw or drill with appropriate bits
- Level
- Screwdriver
- Adjustable wrench
- Pipe cutter or tubing bender
- Torque wrench
- Vacuum pump and manifold gauge set
- Electrical supplies (disconnect box, conduit, and wiring)
- Cable ties or straps
- Tape measure
Choose the installation locations:
Select appropriate locations for both the indoor and outdoor units of the mini-split system. The indoor unit should be installed on an interior wall, away from direct sunlight or sources of heat or cold. The outdoor unit should be placed on a level surface with adequate airflow and drainage, away from windows or doors to minimize noise transmission.
Install the mounting bracket for the indoor unit:
Following the manufacturer's instructions, attach the mounting bracket for the indoor unit to the wall, ensuring that it is level and securely fastened to the wall studs or anchors.
Drill the hole for the line set:
Using a hole saw or drill with an appropriate bit, drill a hole through the wall to connect the indoor and outdoor units. This hole should be large enough to accommodate the line set and should be angled slightly downward from the indoor unit to promote proper condensate drainage.
Install the indoor unit:
Carefully lift the indoor unit onto the mounting bracket, ensuring that it is securely attached and level. Feed the line set through the hole in the wall, leaving enough slack for connections to the outdoor unit.
Install the outdoor unit:
Place the outdoor unit on a mounting pad or bracket, ensuring that it is level and properly positioned. Follow the manufacturer's guidelines for minimum clearance requirements to ensure adequate airflow and service access.
Connect the line set:
Connect the refrigerant lines, electrical wires, and condensate drain line between the indoor and outdoor units. Use a pipe cutter or tubing bender to shape the refrigerant lines as needed, and tighten the flare connections with a torque wrench according to the manufacturer's specifications. Secure the electrical wires with cable ties or straps, and connect them to the terminal block inside the outdoor unit.
Install the electrical components:
Install a disconnect box near the outdoor unit and run conduit and wiring between the disconnect box and the unit. Connect the wiring to the terminal block inside the outdoor unit, following the manufacturer's wiring diagram. Additionally, connect the mini-split system to a dedicated circuit breaker in your home's electrical panel.
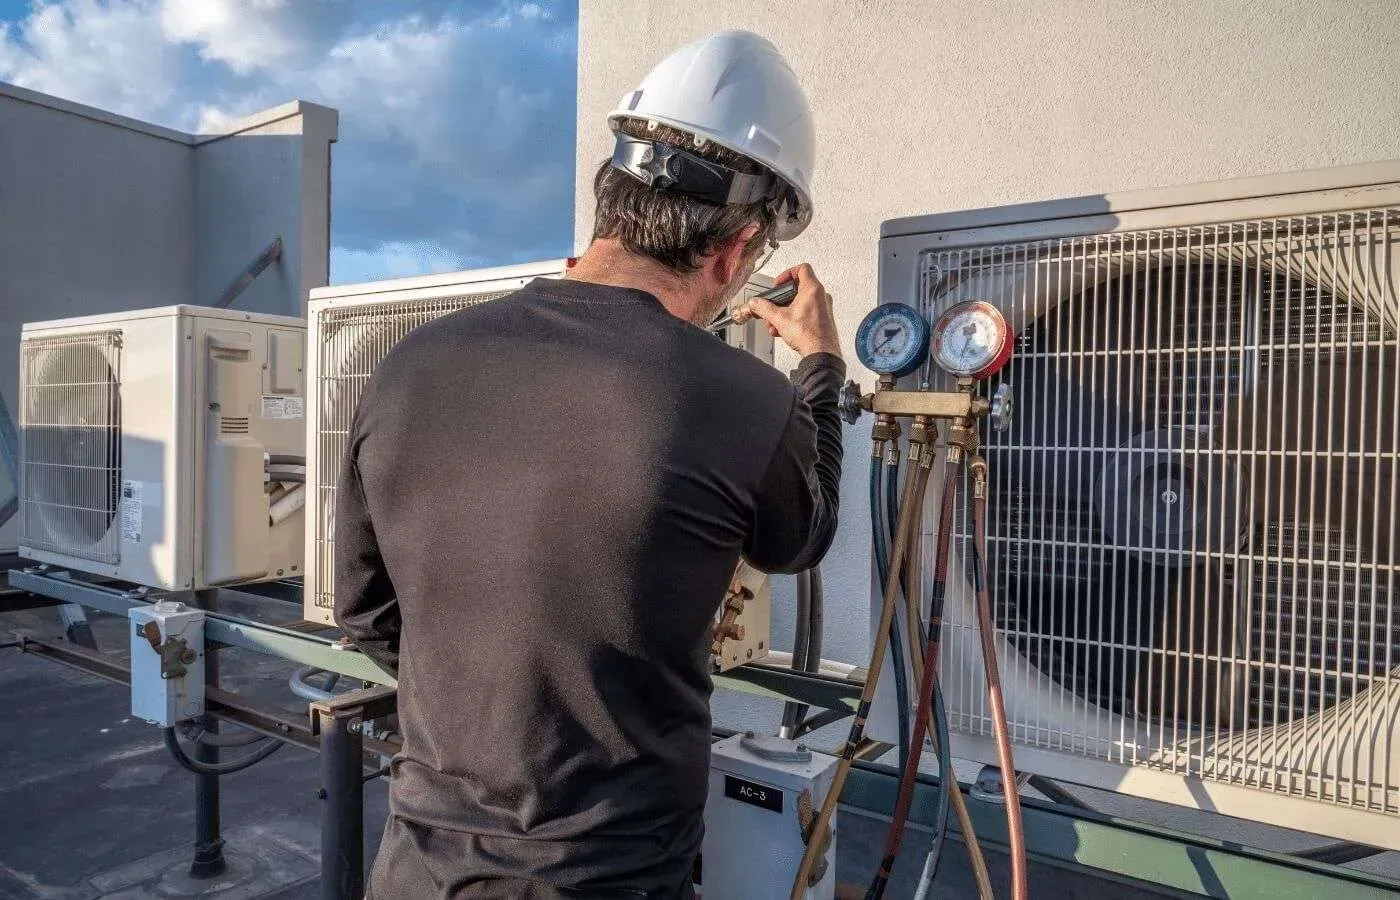
Evacuate and charge the refrigerant lines:
Using a vacuum pump and manifold gauge set, evacuate the refrigerant lines to remove any air or moisture. Once the lines have been evacuated, open the valves on the outdoor unit to release the pre-charged refrigerant into the system. Check for any refrigerant leaks and address any issues as needed.
Test the mini-split system:
Restore power to the mini-split system and test its operation by turning on the indoor unit. Check that both the heating and cooling functions are working properly, and that the air is being distributed evenly throughout the space. Listen for any unusual noises or vibrations, and ensure that the condensate drain line is properly draining any moisture produced by the indoor unit.
Seal the hole and tidy up:
Once the mini-split system is functioning correctly, seal the hole in the wall where the line set passes through, using expanding foam or another appropriate material to prevent drafts and pests. Use cable ties or straps to secure the line set to the wall or other surfaces, ensuring that it is neat and organized. Replace any wall covers, insulation, or siding that was removed during the installation process.
Conclusion:
Installing a single zone mini-split system can be a rewarding project for homeowners with some electrical and HVAC experience. By carefully selecting the appropriate locations for the indoor and outdoor units, properly connecting the line set and electrical components, and testing the system to ensure optimal performance, you can enjoy the energy-efficient heating and cooling benefits of a mini-split system in your home. Always remember to follow the manufacturer's guidelines and consult a professional HVAC technician if you encounter any difficulties or uncertainties during the installation process. Regular maintenance and servicing will also help to extend the life of your mini-split system and ensure its continued efficiency and effectiveness.